|
Build a gear ratio program in excel with wheel sizes and all the motor rpm's
including gears that the numbers are set to zero until you use them. Inserting
the different sizes will make it easy to figure out what gears you will need
very quickly.
|
|
v v v v v v |
GEAR1 SIZE |
GEAR2 SIZE |
GEAR3 SIZE |
GEAR4 SIZE |
GEAR5 SIZE |
GEAR6 SIZE |
GEAR7 SIZE |
GEAR8 SIZE |
|
|
ENTER SIZE |
>>>>>>>> |
14 |
50 |
14 |
50 |
21 |
28 |
1 |
1 |
<<<<<<<<<<< |
|
MOTOR TYPE |
MOTOR RPM |
GEAR1 RMP |
GEAR2 RPM |
GEAR3 RPM |
GEAR4 RPM |
GEAR5 RPM |
GEAR6 RPM |
GEAR7 RPM |
GEAR8 RPM |
MOTOR TYPE |
|
FISHER PRICE |
20326 |
20326 |
5691.28 |
5691.28 |
1593.5584 |
1593.5584 |
1195.1688 |
1195.1688 |
1195.1688 |
FISHER PRICE |
|
CHIPAWA |
5342 |
5342 |
1495.76 |
1495.76 |
418.8128 |
418.8128 |
314.1096 |
314.1096 |
314.1096 |
CHIPAWA |
|
VAN DOOR |
150 |
150 |
42 |
42 |
11.76 |
11.76 |
8.82 |
8.82 |
8.82 |
VAN DOOR |
|
GLOBE |
97 |
97 |
27.16 |
27.16 |
7.6048 |
7.6048 |
5.7036 |
5.7036 |
5.7036 |
GLOBE |
|
WINDOW |
91 |
91 |
25.48 |
25.48 |
7.1344 |
7.1344 |
5.3508 |
5.3508 |
5.3508 |
WINDOW |
|
LARGE CHIP |
2500 |
2500 |
700 |
700 |
196 |
196 |
147 |
147 |
147 |
LARGE CHIP |
|
MOTOR |
0 |
0 |
0 |
0 |
0 |
0 |
0 |
0 |
0 |
MOTOR |
|
MOTOR |
0 |
0 |
0 |
0 |
0 |
0 |
0 |
0 |
0 |
MOTOR |
|
MOTOR |
0 |
0 |
0 |
0 |
0 |
0 |
0 |
0 |
0 |
MOTOR |
| |
^ ^ ^ ^ ^ ^ |
|
|
|
|
|
|
|
|
|
|
|
|
|
GEARS OF THE SAME COLOR ARE TIED TOGETHER |
|
|
|
|
Above is what we use in excel, simple to make and use. Contact us if you
would like the file e-mailed to you.
_______________________________________________________________________________________________
Steel Cabling

Above is a 8020 arm we used, it could lift the robot. We could lean it back
to start on an angle which would allow for a longer reach when deployed. If
stacked with three pieces it would go three times as high.
When running steel cable
1.
The pulley that it will go around should not be too small, this will
cause the cable to kink and wear out or become tangled.
2.
Do not secure it solid, make a loop around a post or bolt and secure it
to it self. This will allow it to move with the change in angle of the cable.
3.
Allow for a way to keep tension on it, or an adjustment to tighten it. It
will stretch as you use it.
4.
You can run it through a cable housing (like bicycle brake cable) so you
can make wide turns or allow for flexibility. Below you can see the curve cable
(white) with the steel cable (purple) coming out to attach to the mechanism.
5.
You can use pneumatics to drive it one way and spring tension to draw it
back.
6.
You can use a threaded pipe to drive it, as a motor turns the pipe the
cable will feed in on one side and feed off the other side and because the pipe
is threading as it turns the cable feed location stays stationary.
7.
Use a bolt instead of a crimp. Take a bolt than install a washer on it
and just below the washer drill a hole big enough to put you cable through than
install another washer with a nut. With this assembly you can adjust it later or
easily remove it.
8.
If you lift a item that is 100 lbs. it will put more than a 100 lbs. on
the pulley that it is going around. Angle and corners will stress a cable more
than you would expect.
Gears
1.
If you use a gear for a lifting arm you must watch out for coasting. The
break on the motor control circuit will not be enough to hold it in place. You
can make a break from a pneumatic that will release when power is applied to the
motor.
2.
You can use a heavy spring to help counter balance the arm weight to stop
costing.
3.
Larger teeth for the gear are better than small teeth. They require less
tolerance for gear centers.
4.
Worm gears work better for arms, coasting is cut down.
5.
Keep tract of your speed after gearing of items, you may under or over
estimate the power need or lost in the process.
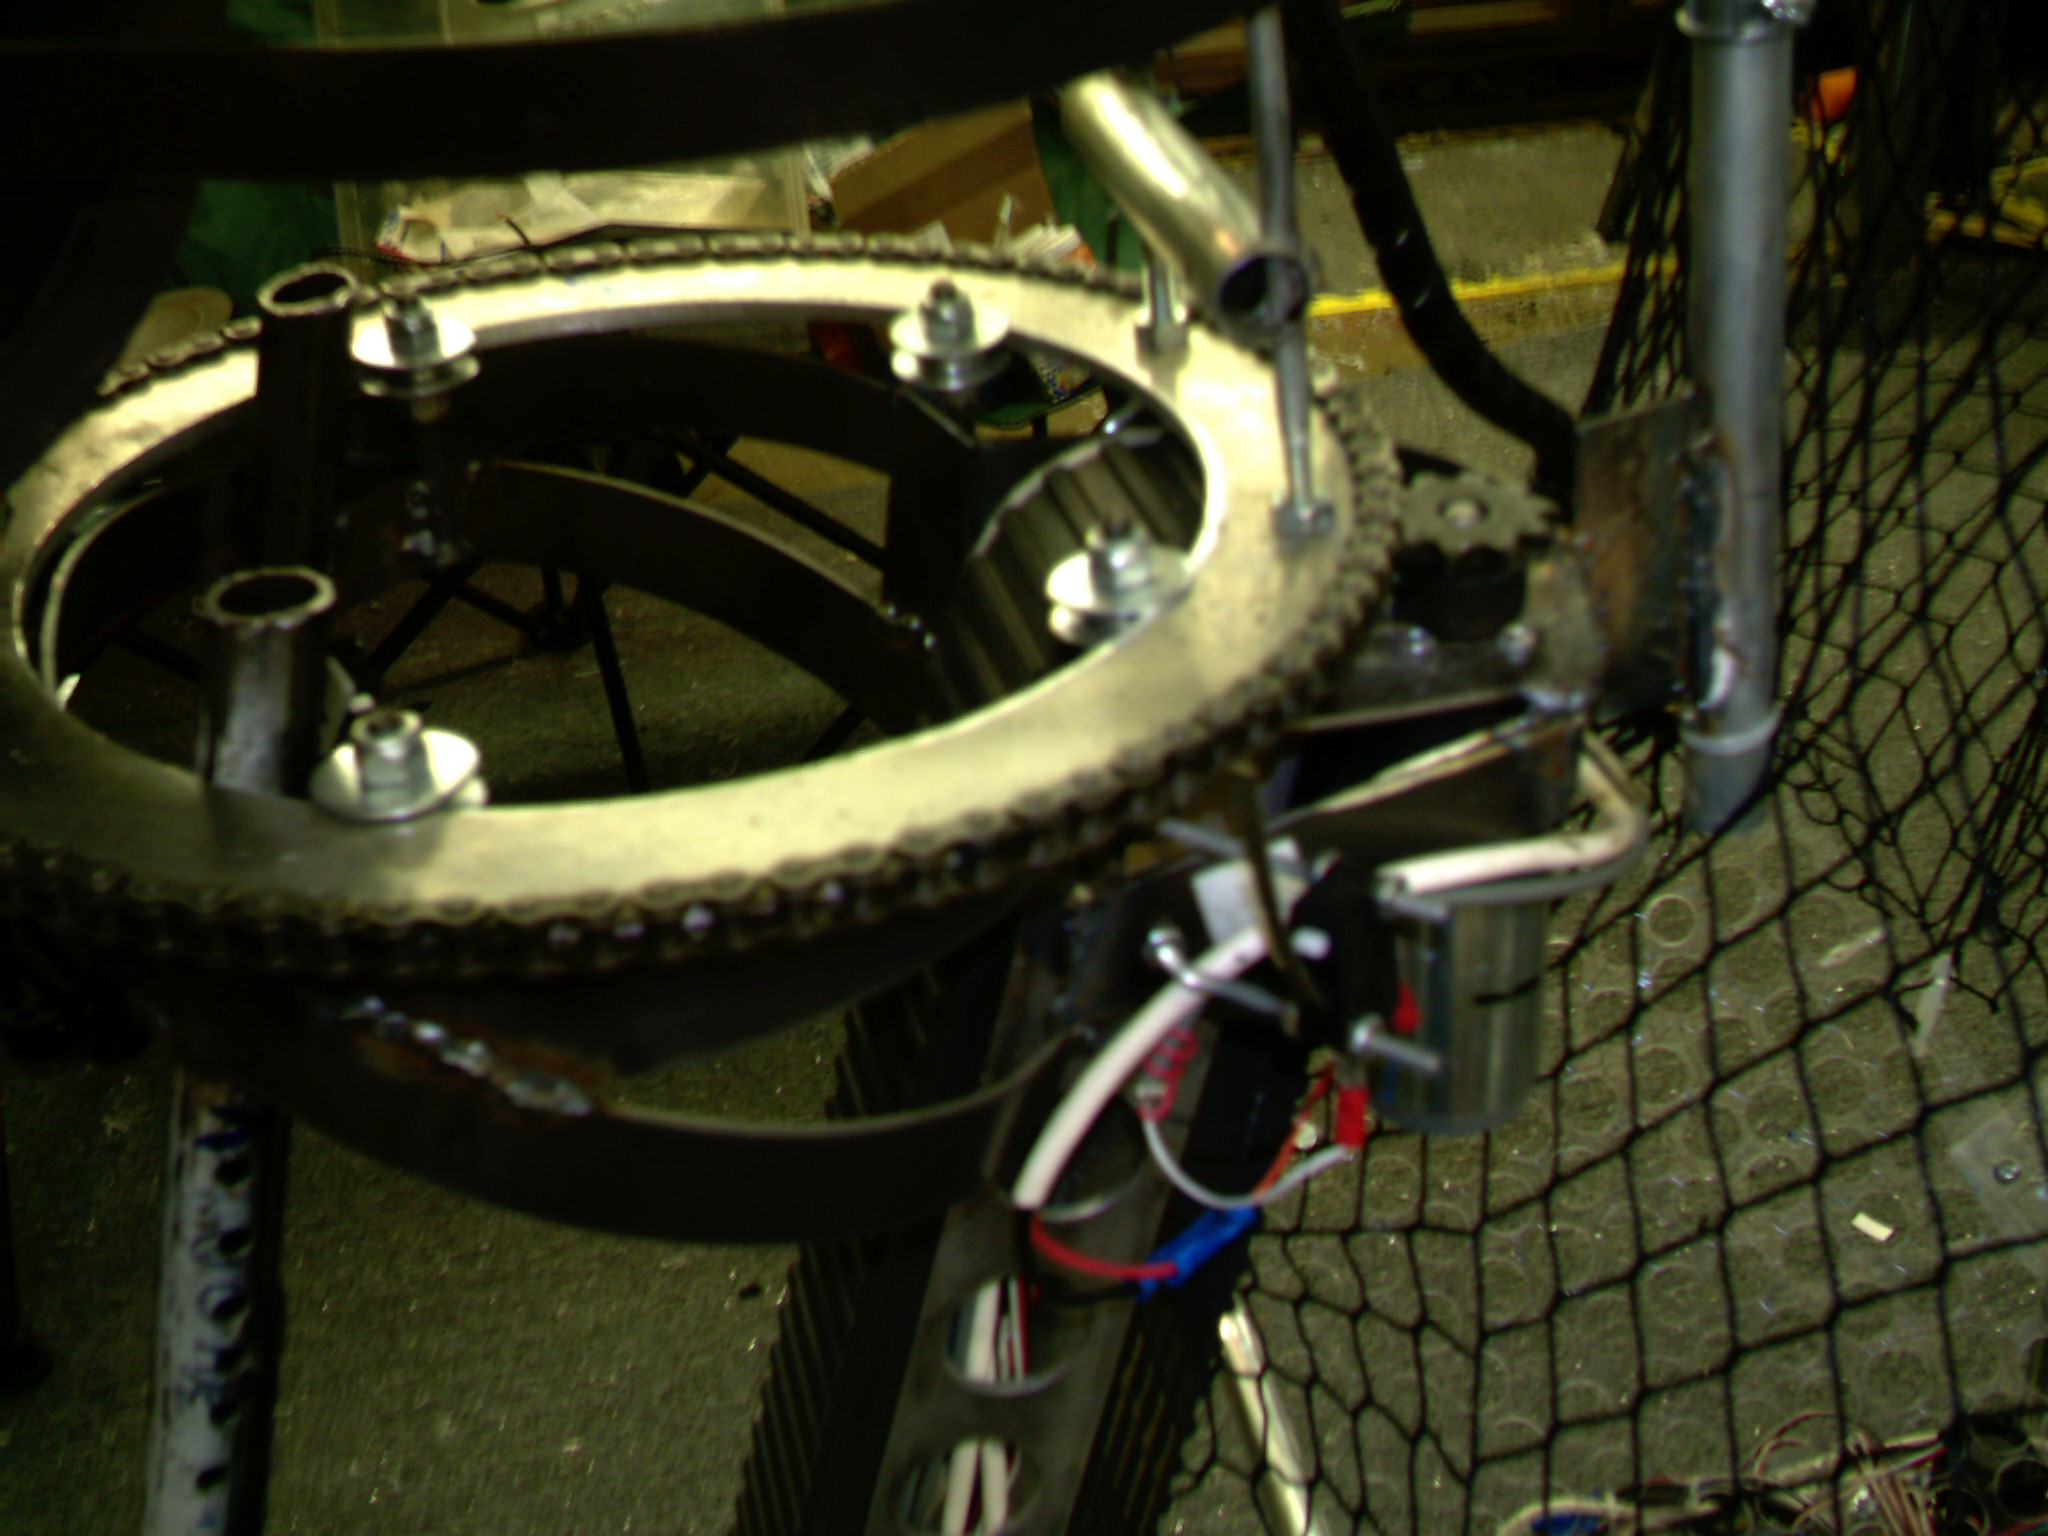
Large Gears
Need a large gear for a turn table that don't have to go all of the 360
degrees and have no way of making it or buying it. Take a Piece of 1/4
aluminum and cut it into the size you need. Lets say 12 in diameter, and tie a
chain on the edge and wrap it around the circumference and bolt the other end.
Now all you have to do is put a sprocket up against it on a drive motor.
Sprockets and Chain
1.
Make sure you allow for chain tension adjustments in your design.
2.
You can use blocks of HDPE to push against the chain to tension if
needed.
3.
Allow for room to get your fingers in to install the chain links.
4.
You want enough chain to wrap around the gear to be sure there is not
slippage of the chain.
Threaded rod
1.
You can use threaded rod to push or pull an arm, but the location of the
pivot can cause problems. If it is close to the pivot you can make it move fast
but there will be more heat on the threads from the weight. If it is farther
away than you must increase the speed and that will cause more heat on the
thread. You must balance weight and speed to keep the treads from over heating.
When the thread heat up they will expand and make it hard to turn inside of the
nut or rod coupler you are using.
2.
A larger thread would help spread the heat out but that would cause more
friction and make the motor work harder.
Casters
1.
Caster are not a good choice to use unless most of the weight of the
robot is over the drive wheels
2.
Caster drag down the robot when you try to turn.
3.
Omni wheels are a better choice over casters, especially if they are
driven.
Make
allowance for add-ons or repairs
1.
The size of the robot should be less than requirements to allow for
add-ons such as panels or bolts.
2.
If you make an electrical board leave a space to add a relay or PWM.
3.
Do not put a motor in a spot that it can not be easily replaced.
Pneumatics
1.
Use a different color tubing for the in and out for the cylinders. You
can keep tract of which line is which.
2.
Watch the size of your cylinders, large ones use alot of air volume, you
may have to wait until it pumps up to use it again.
3.
If you need an extra storage tank you can use a cylinder, just make sure
it is hooked up and can be used for some thing. This does not mean you have to
use it in competition.
4.
If you need to save air you can use a spring to retract it.
5.
You can get three positions on a pneumatic. Position one apply air to one end,
position two apply air to the other end, position three apply air to both ends
at the same time and this will put the piston in mid position.
Limit switches and sensors
1.
The pressure on the limit switch should not be more than the switch can
handle. The speed or the weight of the mechanism can break the switch.
2.
If you can build a mechanism that is separate from the limit. The item
will push against the mechanism and the mechanism will push against the limit.
This will protect the limit and also assure that it will work every time. With
this you can design it not to break the limit at its extreme locations.
3.
Roller type limit switches work better and last longer than sliding over
the switch.
Ball Feeders
- You can load multiple balls but it is difficult to
funnel them into one channel.

- If you load multiple balls you should store them in the
same multiple direction of the pick up.
   
- Allow for spacing between balls when they are driven to
exit. As they roll they will climb on top of each other and jamb or you can
drive both sides of the ball so they do not roll when they move.

- Do not use a basket or similar to catch balls unless
they can separate as they go in. It only takes three balls to form a triangle
to jamb the funnel.

- A single wheel at the apex of the ball will pick the
ball up very well from the floor

Nuts & Bolts
1. When
using nuts and bolts to hold plastic parts do not over tighten. The plastic will
compress and the bolt will never completely tighten. You must use a nylock nut
if you do not want it to come loose.
2. A lock
washer or lock tight should always be used on nuts. As the robot is used the
movement will shake apart the nuts and bolts. Even if you think it's tight it
can come apart at the worst time. Aluminum is softer than steel and will work
apart as it is used.
3. It is
helpful if you use the same nuts and bolts on the whole robot. If you are
using 1/4 x 20 screws with an Allen wrench make all of them Allen type or if you
are using 7/16 wrench make all of them 7/16. This will make it easier to repair
when all you need is one type of tool and one size drill to work on it. You will
have to use different size nuts and bolts on small parts but if you make the
majority of them the same this will make it easy.
4. Do not
over tighten nuts and bolts through tubing as it will collapse. ether use a
nylock nut or install spacers in the tubing to keep it from collapsing.
Top of page
|