Below are some things we learned about designing and programming a
competition Lego
robot using the NXT. Keep in mind a robot that is
consistent and accurate
has a better chance of completing all of the missions.
You can scroll down or quick link below.
MMRA rookie Workshop Fll
robot design tips
MMRA rookie Workshop Fll
sensor tips
FLL HELPFUL DESIGN TIPPS
Working with the students
It is a balancing act working with
the students, you want them to do 100 percent of the build but you also want to
teach them about engineering, science and math.
The students do not have a clue of
what they are doing so you will have to help guide them through the design and
build. You can give them work exercises that allow them to test design ideas
like.
a.Wheel sizes
b.Gear ratios
c.Motor speeds
d.Drive systems.
It is good to come up with a few
designs and test them. Use test results to choose the best design not
popularity. Students tend to be bias toward there friends as apposed to the best
design.
Have the students write down the
tests and the results as they can share this information with the judges. The
judges like to hear about problem solving by the students.
Game Specific Designs
It is great to design a robot to do
all of the missions but may be overwhelming for rookie teams to do and
unnecessary. To impress judges you only need to accomplish a few missions very
well. You will be showing the judges one or two missions and if you can do them
well many times in a row they will give you good reviews.
The judges will be looking for:
a.Durability – Evidence of structural integrity; ability to withstand
rigors of competition
Build a
robot that is of sound construction that does not break or rarely breaks.
b.Mechanical Efficiency – Economic use of parts and time; easy to repair
and modify
The robot
should be streamlined and efficient with out excessive parts. (Like algebra
reduce it to its simplest form after it is built)
c.Mechanization – Ability of robot mechanisms to move or act with
appropriate speed, strength and accuracy for intended task (propulsion and
execution)
The robot
devices should be sound and work well with the speed being used
Build the robot than modify it as
needed. It is easier to redesign a robot than build a new robot. Add strength,
efficiency as you go.
It is common practice to use two
motors for the drives and one motor for the arm. The arm should be built in a
way that the attachments can be changed with ease. If you plan on doing most of
the missions you have to pay close attention on the speed of attachment change
out but if you stick with three or four missions and do them well you will not
need to worry about change out time.
Gears can be used to lift items or
you can go with a simple direct drive lift. The students can work with both and
determine what is best for their game.
Judges
When in the Technical judging room
the students should be ready to answer any questions by the judges about the
robot design process. One student should not answer all of the questions, it is
always better if all the students can make some input to the judges. They will
be asked questions about gear ratios, why did they choose the size of wheels,
how did they come up with the design, what makes your robot unique, show us a
mission, who built the robot (hopefully all the students had some input) and
many more questions. If they do well they may get a call back and must answer
more questions from more judges. The questions will be harder but the students
should have no trouble if they have made it that far. Mentors are not to assist
in the judging process, the students must do it all on there own.
Innovation & Strategy
The judges will be also
looking for the following in your robot design explanations.
a.Organized and well explained – Ability to develop and explain improvement
cycles where alternatives are considered and narrowed, selections, designs
improved
Must be
able to explain and document the development process of the robot build.
b.Mission Strategy – Ability to clearly define and describes the teams game
strategy
Must be
able to explain a clear strategy for the game missions
c.Innovation – Creation of new, unique or unexpected feature(s) (e.g.
designs, programming, strategies or applications) that are beneficial in
performing the specified tasks
Come up
with a creative new design (do not use previous years designs)
A mission contains items that are
moved, pushed or picked up. Your robot will travel to the game piece and
interact with it and return to home base. Your students should not touch the
robot once it leaves the home base or points will be deducted from the score. It
is common for the robot to be returned to base by the students but that mission
will have to be started over to gain the points. There are specific rules
regarding this and they should be studied.
The game is time limited and
consideration for the amount of time needed to complete the missions should be
taken. It is very difficult to complete all of the missions but some teams do.
Because the robot mission portion of the competition is a small percentage you
should not make it a top priority to complete all of the missions. Do three or
four missions very well and your students will feel much better about themselves
than if they fail at 10 to 12 missions.
You will want to get the design and
build process done as soon as possible that way you can get the bugs out and
practice. Practice and time the missions as many times as you can.
It is helpful to have a box to carry
your robot and attachments to the field but it is even better to have a small
cart 2 to 3 ft tall. You are allowed to set your robot up, turn in on and select
your program before the match starts.
You are
allowed a maximum of two drivers (students) at a time at the field. Once the
match starts you are allowed to tag the two drivers out and two new ones in. it
is good to do two to three missions and change and allow the other drive team to
take over as it makes it easier for the students to remember there missions. You
can do this up to five times. (10 students / 2 drivers = 5 drive teams max)
Tournaments
Our first tournament is a practice
tournament (Lego Fever I) and does not count but will help you refine your team
and any problem can be solved before the next tournament. Our second tournament
(Lego Fever II) counts toward going to the state championship and is not as
relaxed as the first. The State Championship is a very serious competition and
you would be going against other winning teams from around the state. The winner
of the State Championship has a chance to go to the world robotics competition
and compete against teams from around the world.
Robot Balance
Placement of the axel "A" will determine how straight the robot will go,
if it is too long it will not turn well and if it is too short it will not run
straight. Experiment.
Placement of the center of the weight "C" will determine how well the robot
will turn, if it is too far forward it will tip and not turn
accurate. If it is too
far back it will turn hard. We place the arm and attachments on the front of the robot to allow for the
balance to be close to the drive wheels. with the balance close to the drive
wheels it puts most of the weight on the drive wheels which gives good traction
and makes for accurate rotation count.
Drive Wheels
The size of the drive wheel is very important, a large wheel will not give
you accurate rotations, and a small wheel will not give you enough speed. If you
must climb items in a game than the large wheel is important but you must
than gear it down for accuracy.
We have found that using tank
tracks restricts how well the robot will turn
accurate.
Using a set of front drive wheels with a skid roller wheel in the rear is the
most effective. It rolls forward very easy so it will allow for good count of
the rotations and if the skid rollers are thin than it allows for the turn to be with little
effort making the turns
accurate.
Other things will affect the
accuracy
of the robot are the temperature of the tires, warm soft tires grip better than
cold hard tires, and dust on the surface, which allows the tires to slip. If the
drives are cold they will not move as easily as warm drives. Weight shift from
use of the arm by lifting items will also change the accuracy. A fully charged
battery verses a week battery will affect the
accuracy
count also.
If you have small wheels with the
power level at 100 percent you will get more rotations thus give you a more
accurate count but you must be careful that the wheels do not slip or jerk the
robot and held parts with the high power.
Programming using meters is more
accurate
than using inches, but using degrees is even more
accurate
because their are 360 degrees in a rotation. So if you program for one rotation
than the wheel rotates 360 degrees and if you program 1 degree your wheel turn a
fraction of the 360 degrees. You will also have to insert a motor reset block to
reset the rotation count. If you use coast the rotations can accumulate and give
false rotation counts. Brake is more accurate but can slow down the movement of
your robot.
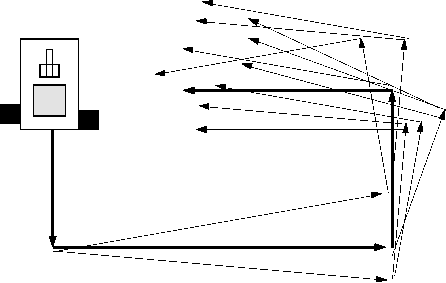
To help with turn
accuracy
you can drive one wheel at a time for turns. Using the turn program built into
the blocks, both wheels are driven (oppositdirections) which can give you a
double count . One degree of turn drives both wheels one degree which in reality
is two degrees which doubles the desired distance but if you run one wheel one
degree and the other does not move you are actually moving one degree. The
diagram below shows this and you can see that the turn circle is larger for a
one drive turn thus more
accuracy.
If the wheels are farther apart
your turn will be more
accurate.
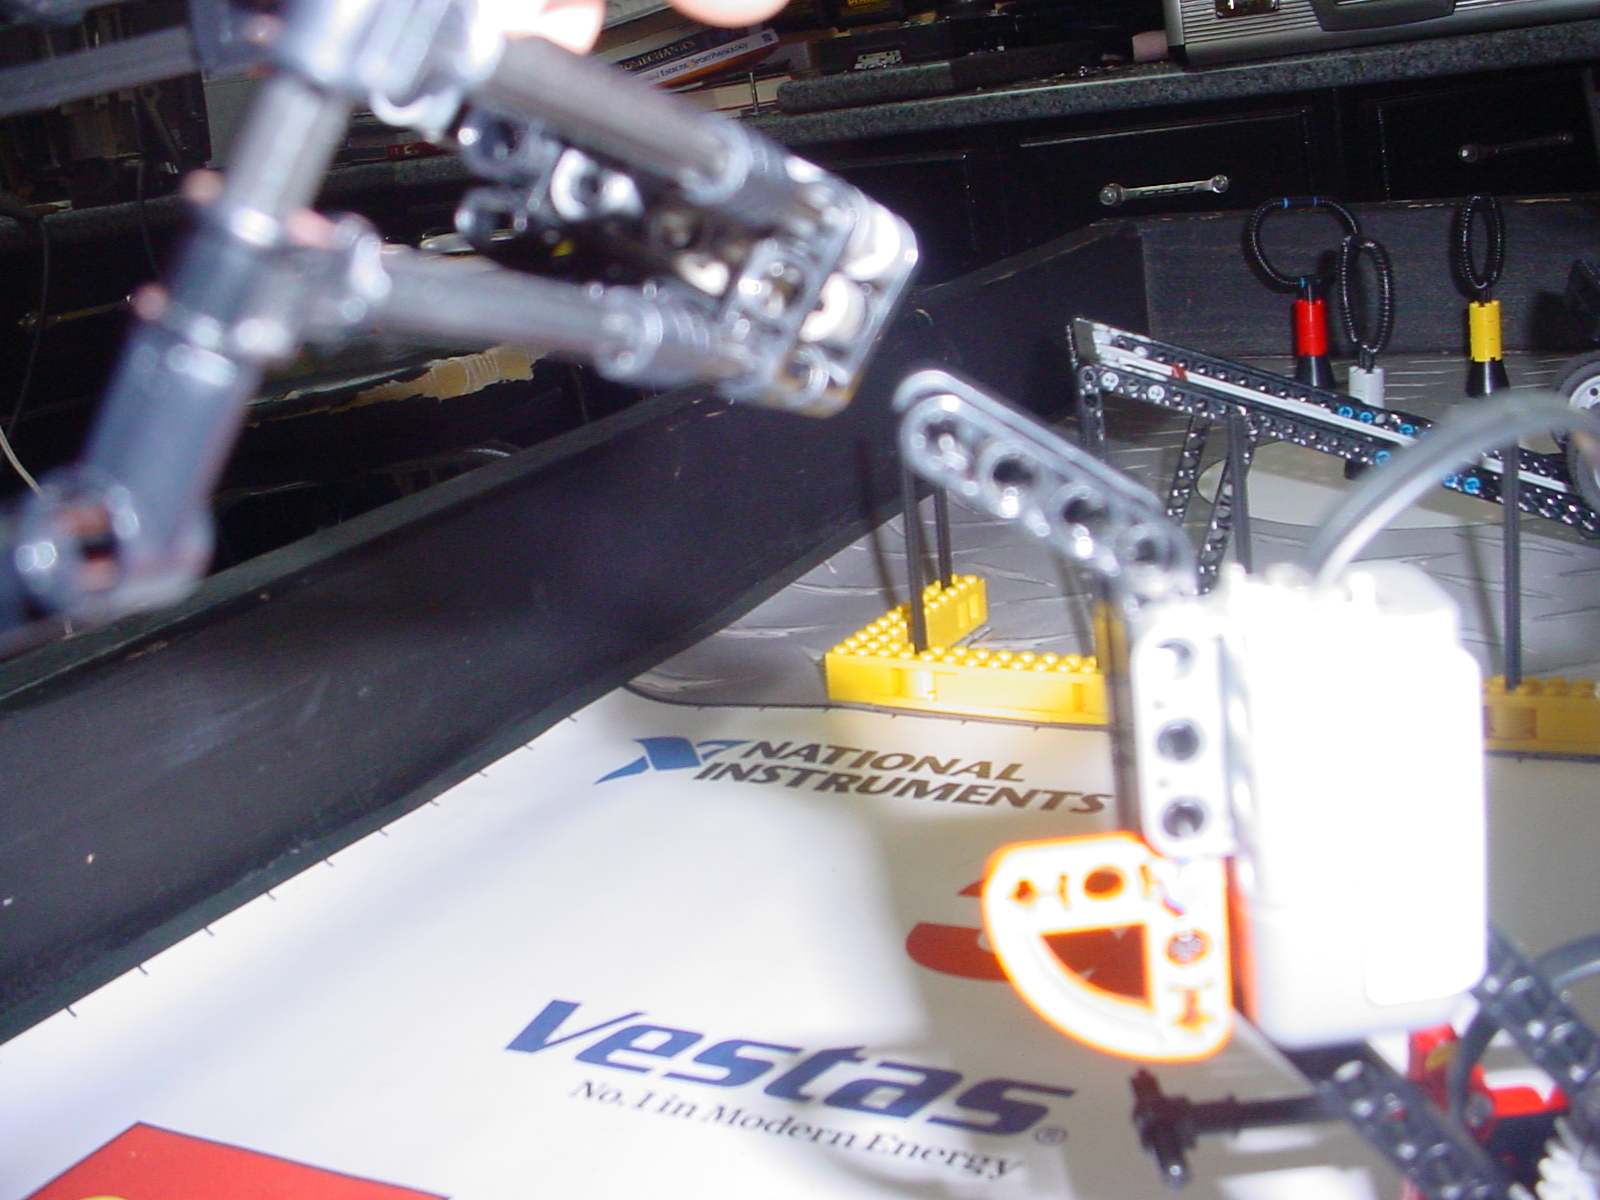
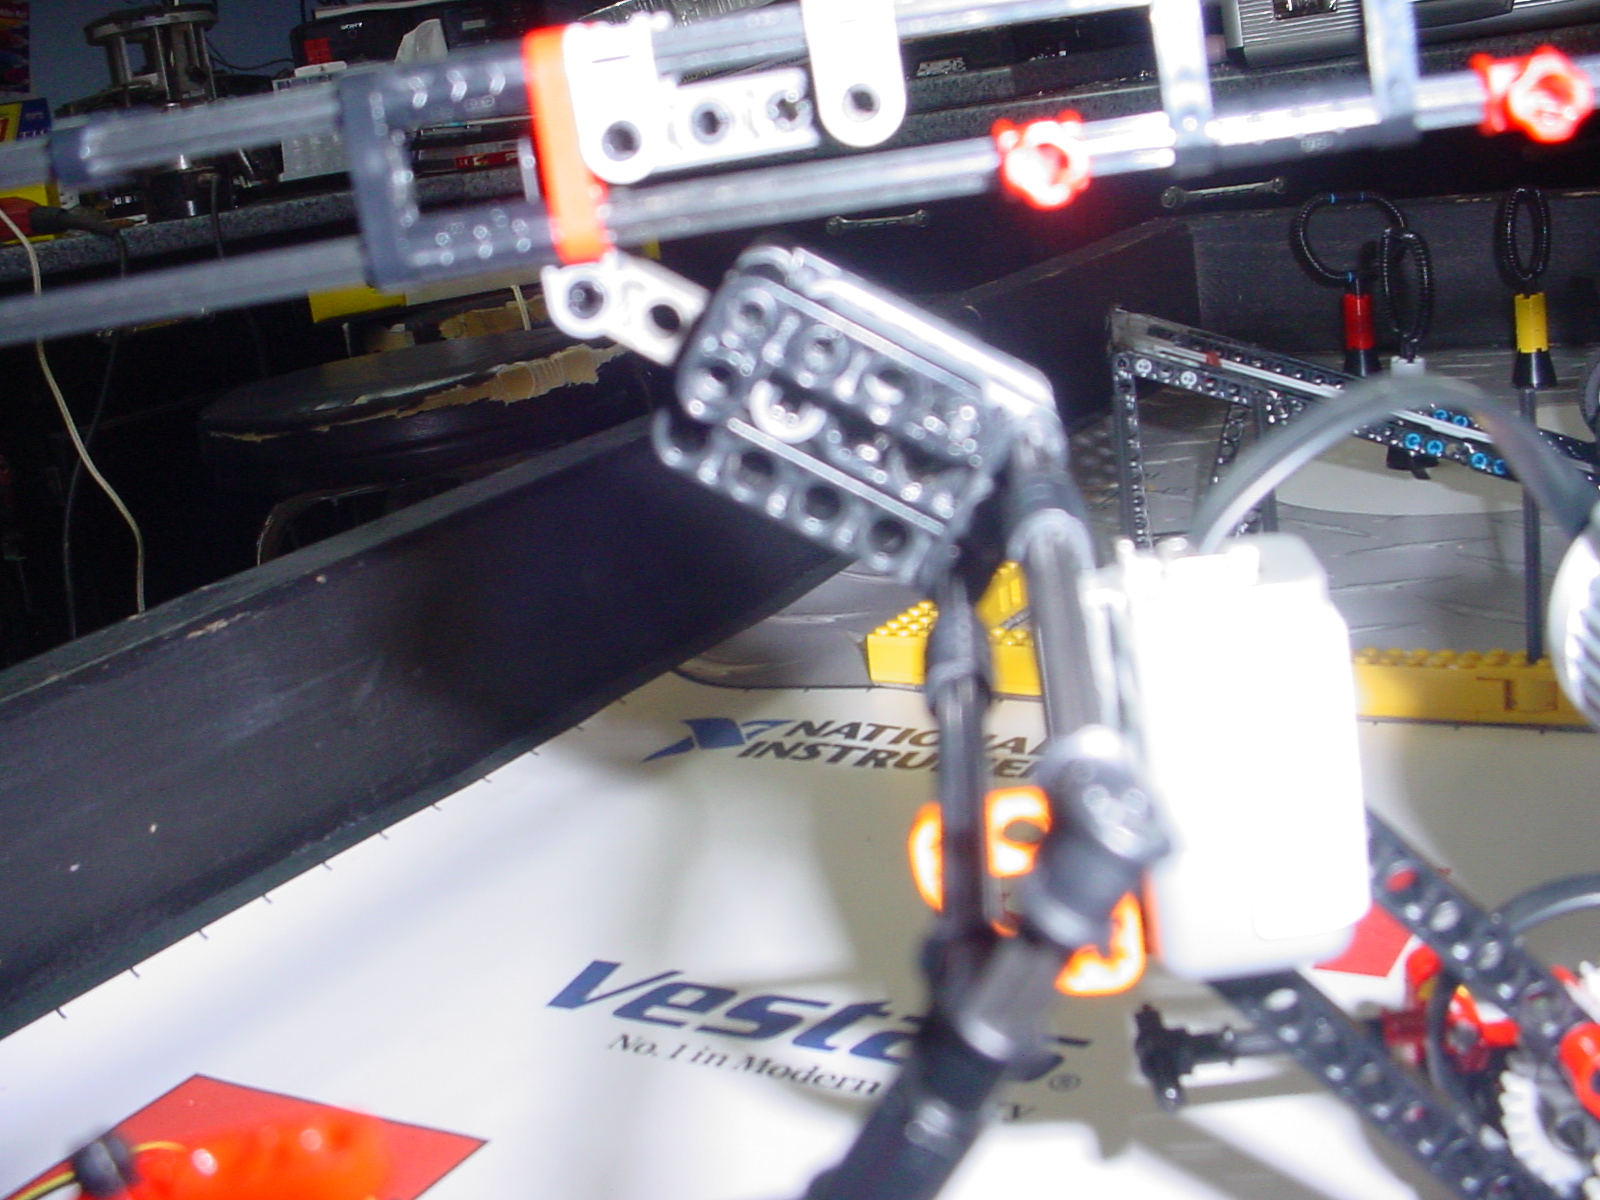
Arms & Attachments
Arms and attachments: if you make
your arms and attachments simple it makes changing them easier. You have less that will go wrong. Design your missions using one
attachment as many times as possible and as the missions progress detach items
not needed as you go. It is easier to take parts off the robot than it is to
install them. An example is lets say you have an arm with many parts to do
multiple missions and as the missions progress you take off the items you don't
need and by the end of the missions you may not have any thing left, than the
last mission is the one where you must push something to place it. If you design
the attachments to be added during the matches it may take additional time to
assemble and make it all fit. One way of making this attachment easier is using
pins and loops for the attachment. Another words provide a part on the robot
that has a loop sticking out that you can slide a pin through it and your
attachment. When attaching the item you mate it to the robot and slid a rod with
a handle through it. Removal is just as easy. Some times your items do not even
need to be attached, just drop it into a hole area in your robot and gravity
will hold it in place.
Build
two robots
Build two robots if you can.
After you build the robot you are going to compete with, build a second
identical robot. This will allow two teams to program at the same time by taking
turns with the computer and the field. This will cut your programming time in
half. Also while working together like this they can see how each others
missions will come together at the end. When all the programs are completed and
because their are slight differences in the movement of the two robot you must
reduce to one robot. Choose the best robot of the two and use that robot for the
final fine tuning of the missions. The drivers should be selected from the two
Program teams, they are familiar with their programs and should drive that
portion of the programs. This would be two drivers for the first half and two
drivers for the second half. This will also make it easier for the drivers to
remember what they must do for their missions.
Remember to place the access
door for the battery in a way that you can remove it with out taking apart your
robot. This will make battery changing quick.
Sensors & Zero Point
Don't be afraid to try the sensors. Once you use them they become easy. Using
the mat lines to locate your robot is always a plus. If you build a light guard
around the light sensor it will protect it from unwanted light or different
light levels. Using the ultrasonic sensor
is useful to have your robot stop or turn at the right spot. It can check the
distance to the wall or the item.
As
you program turns the more turns the farther off the robot can get from the
intended finish point. If you can find a way to have a zero point one or two
turns in, its like having a new start point. Just make sure your robot is at the
same angle every time you reach that point.
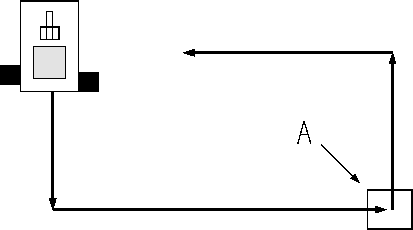
If
you can have two lines to check ("A" above) or a wall to run into or a game
piece that don't move, you can use it to bump the robot into, its like telling
the robot it has a new start point. When running into items the program may
freeze the program because it can not finish the count when using degrees or
rotations so you use them to get close than switch to timed distance to
continue with the program and bump into the item. Also build the bumper solid and flat so it
will help square the robot against the wall ( add a burst of timed full power to
square the robot) and from that point you can go an additional
two turns and be
accurate at the final
destination.
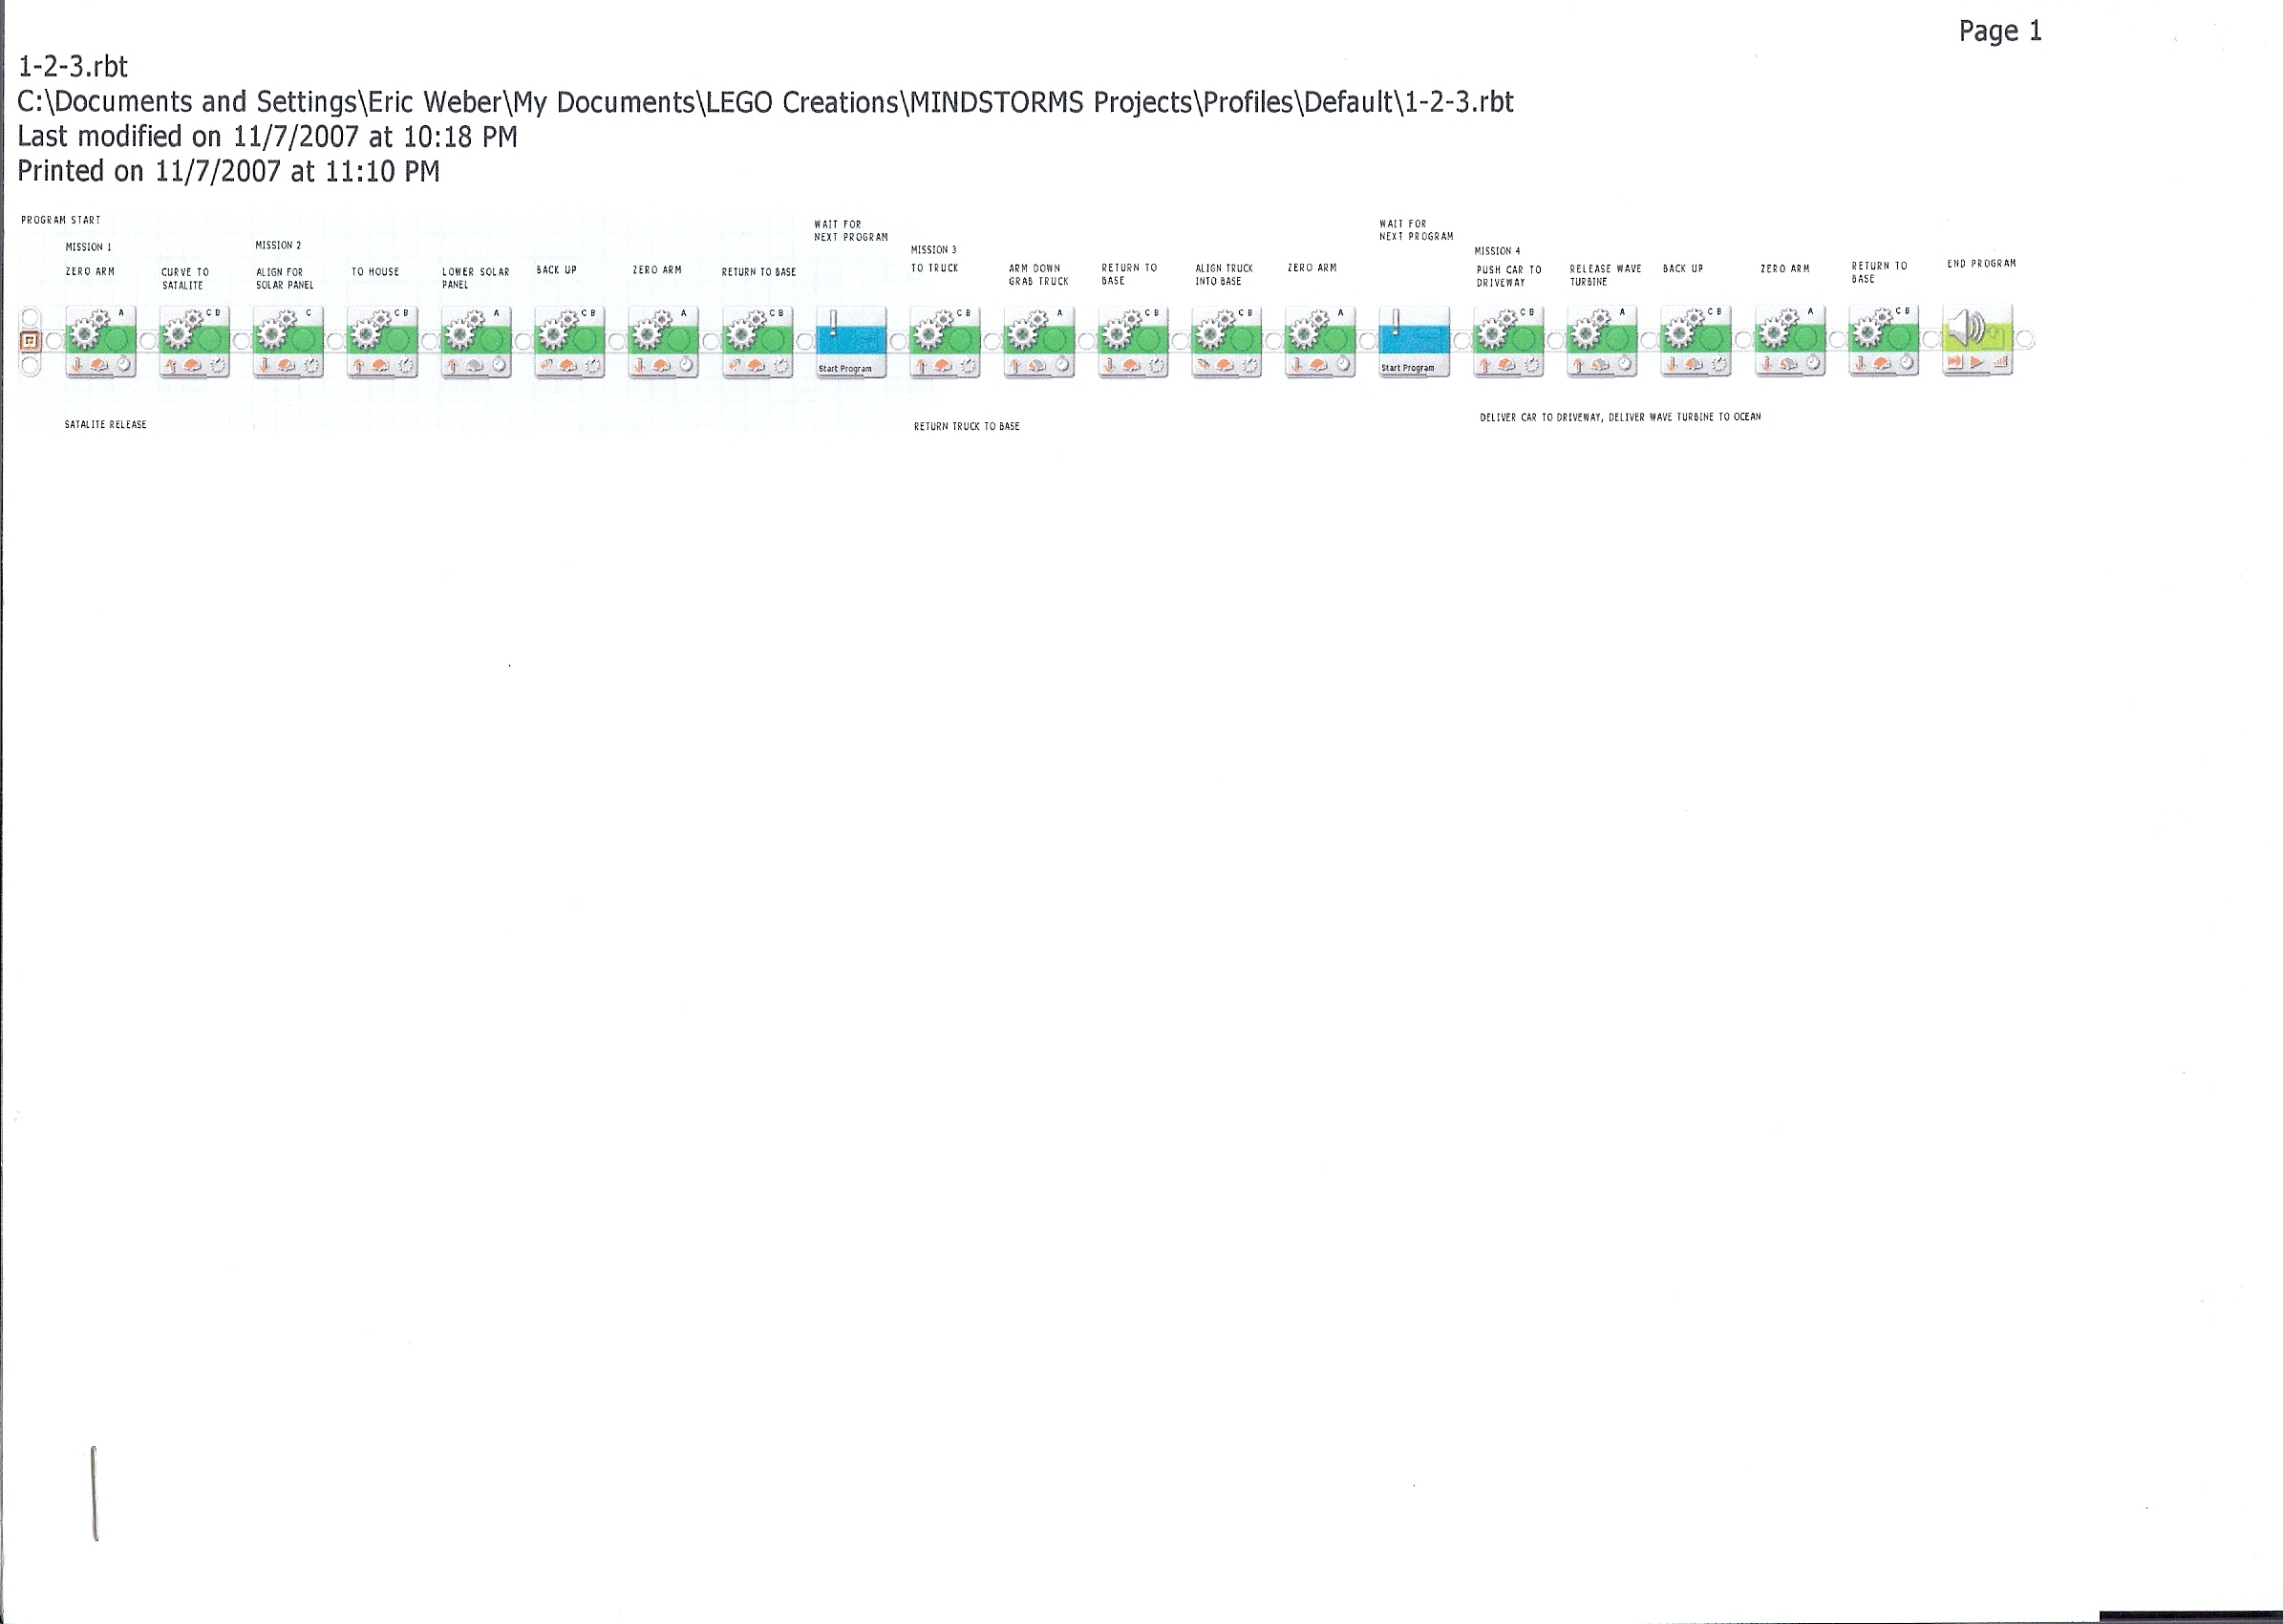
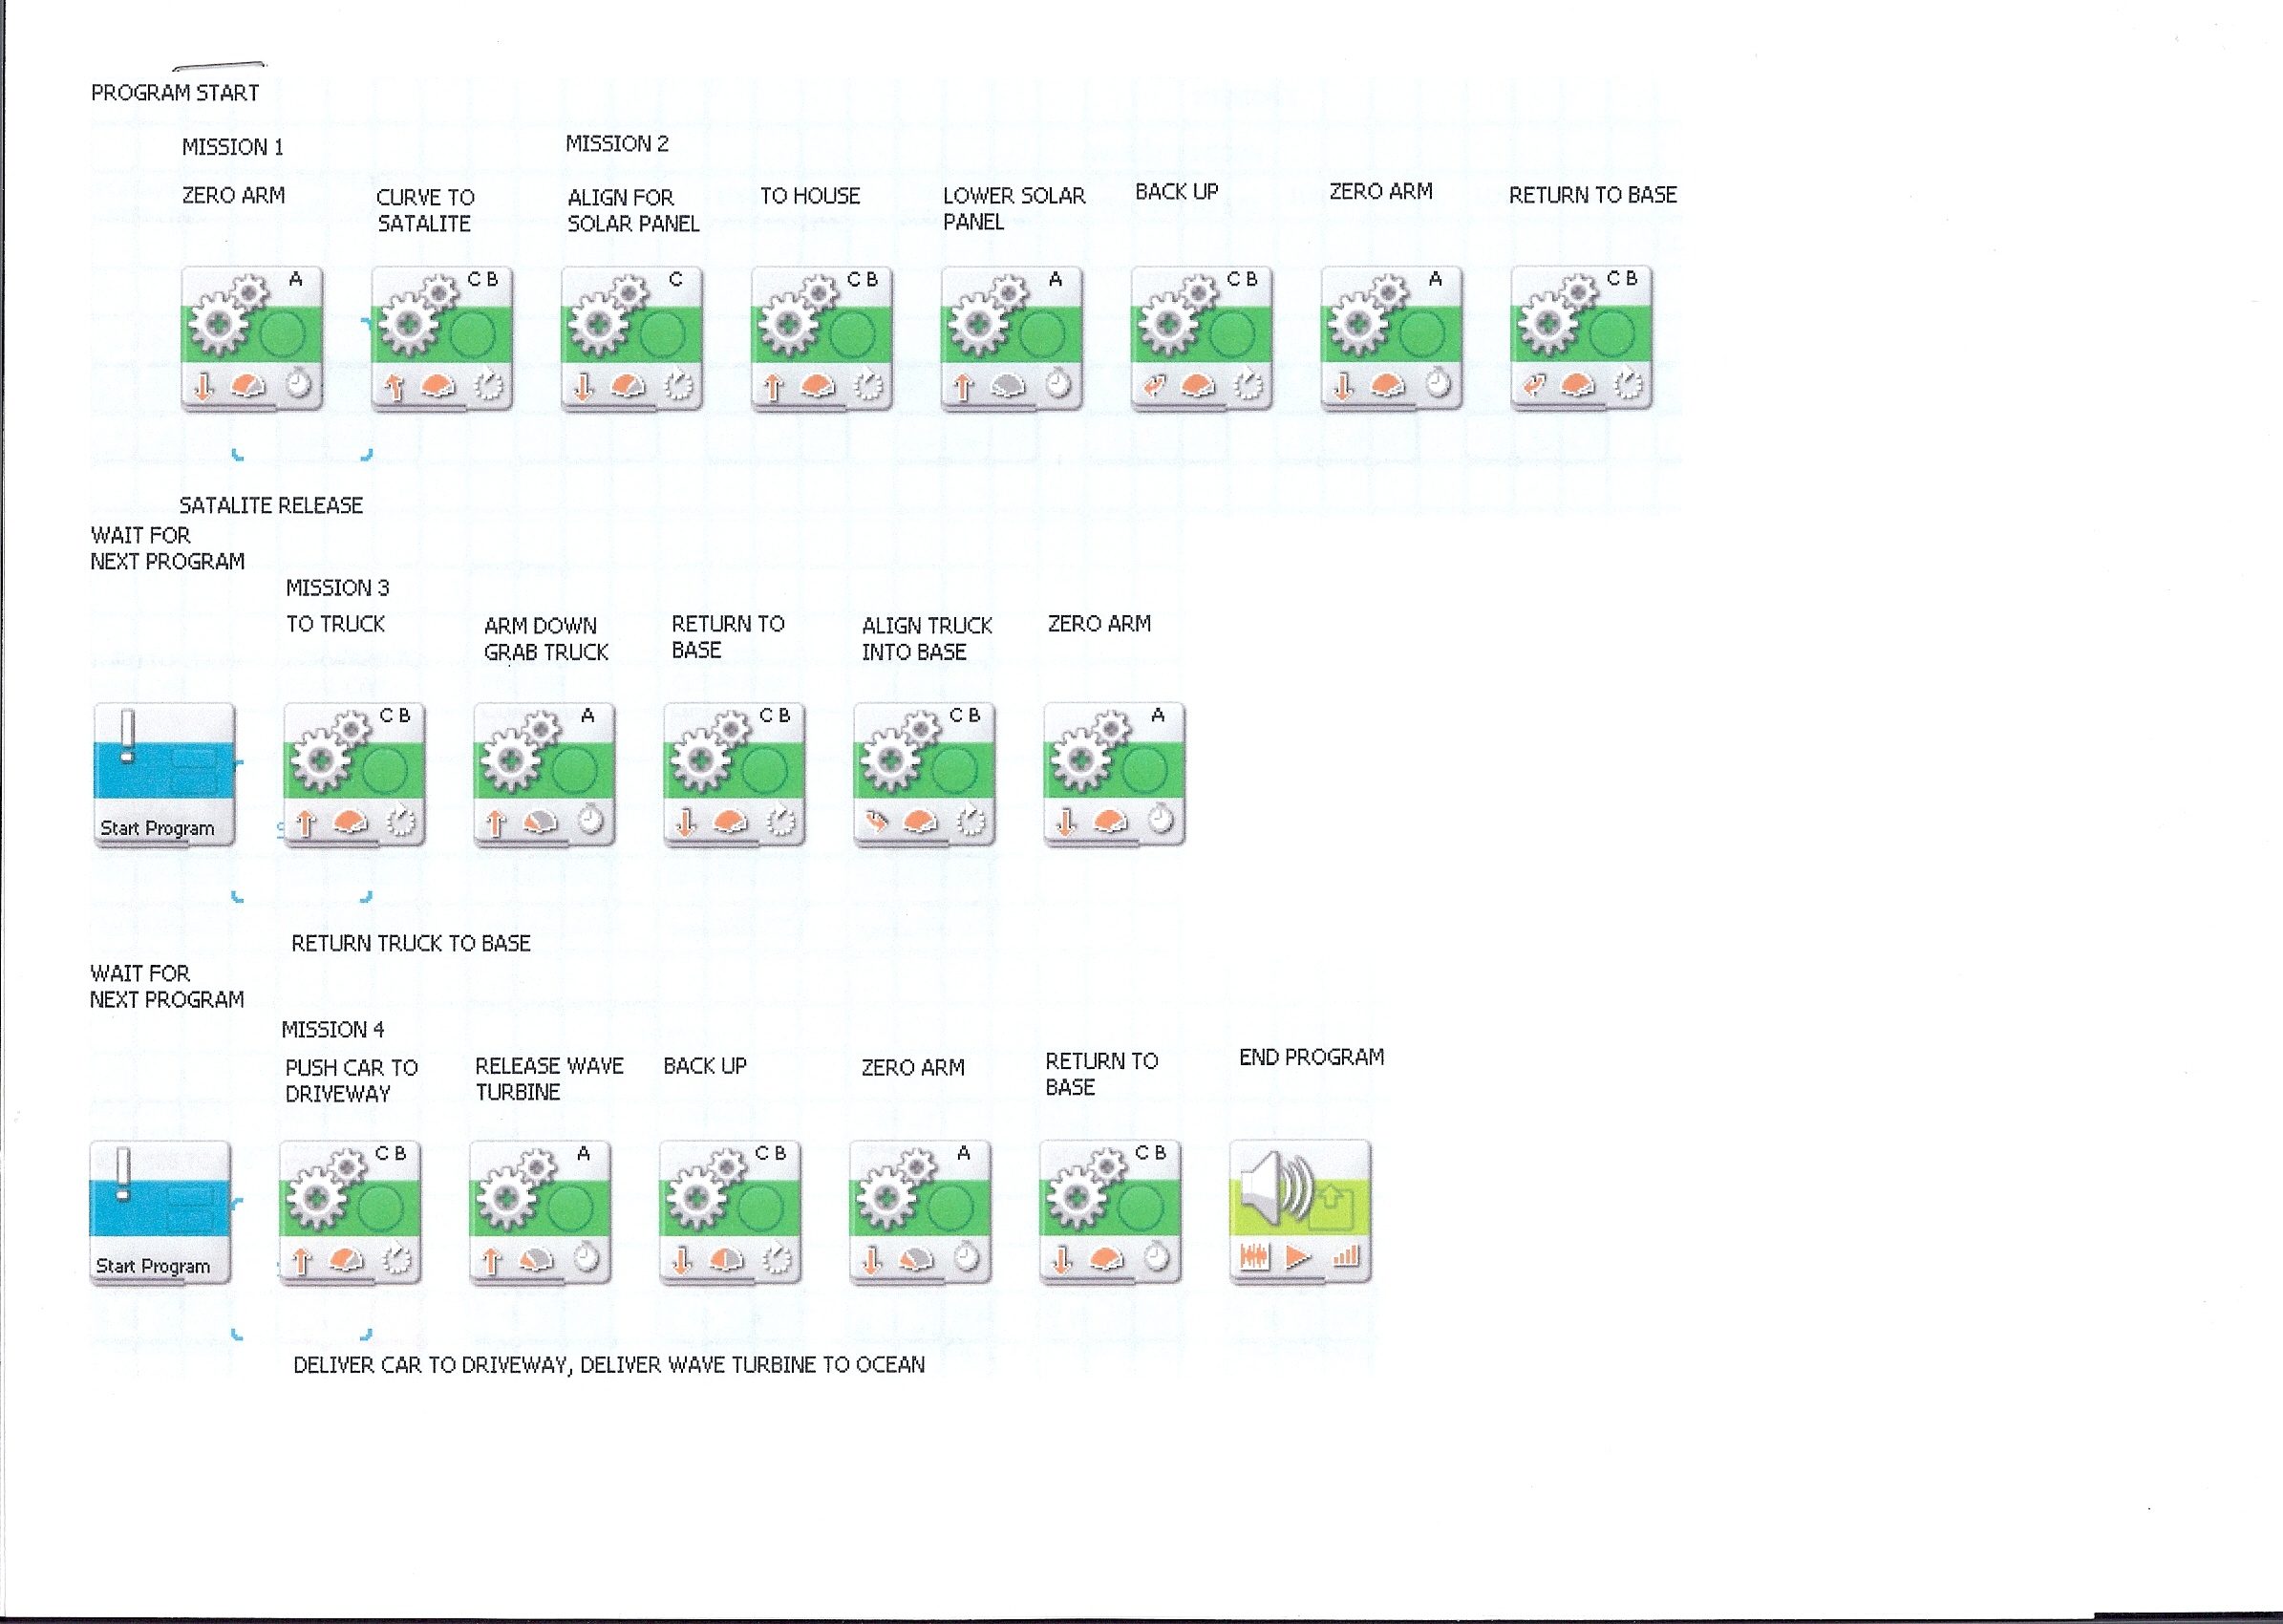
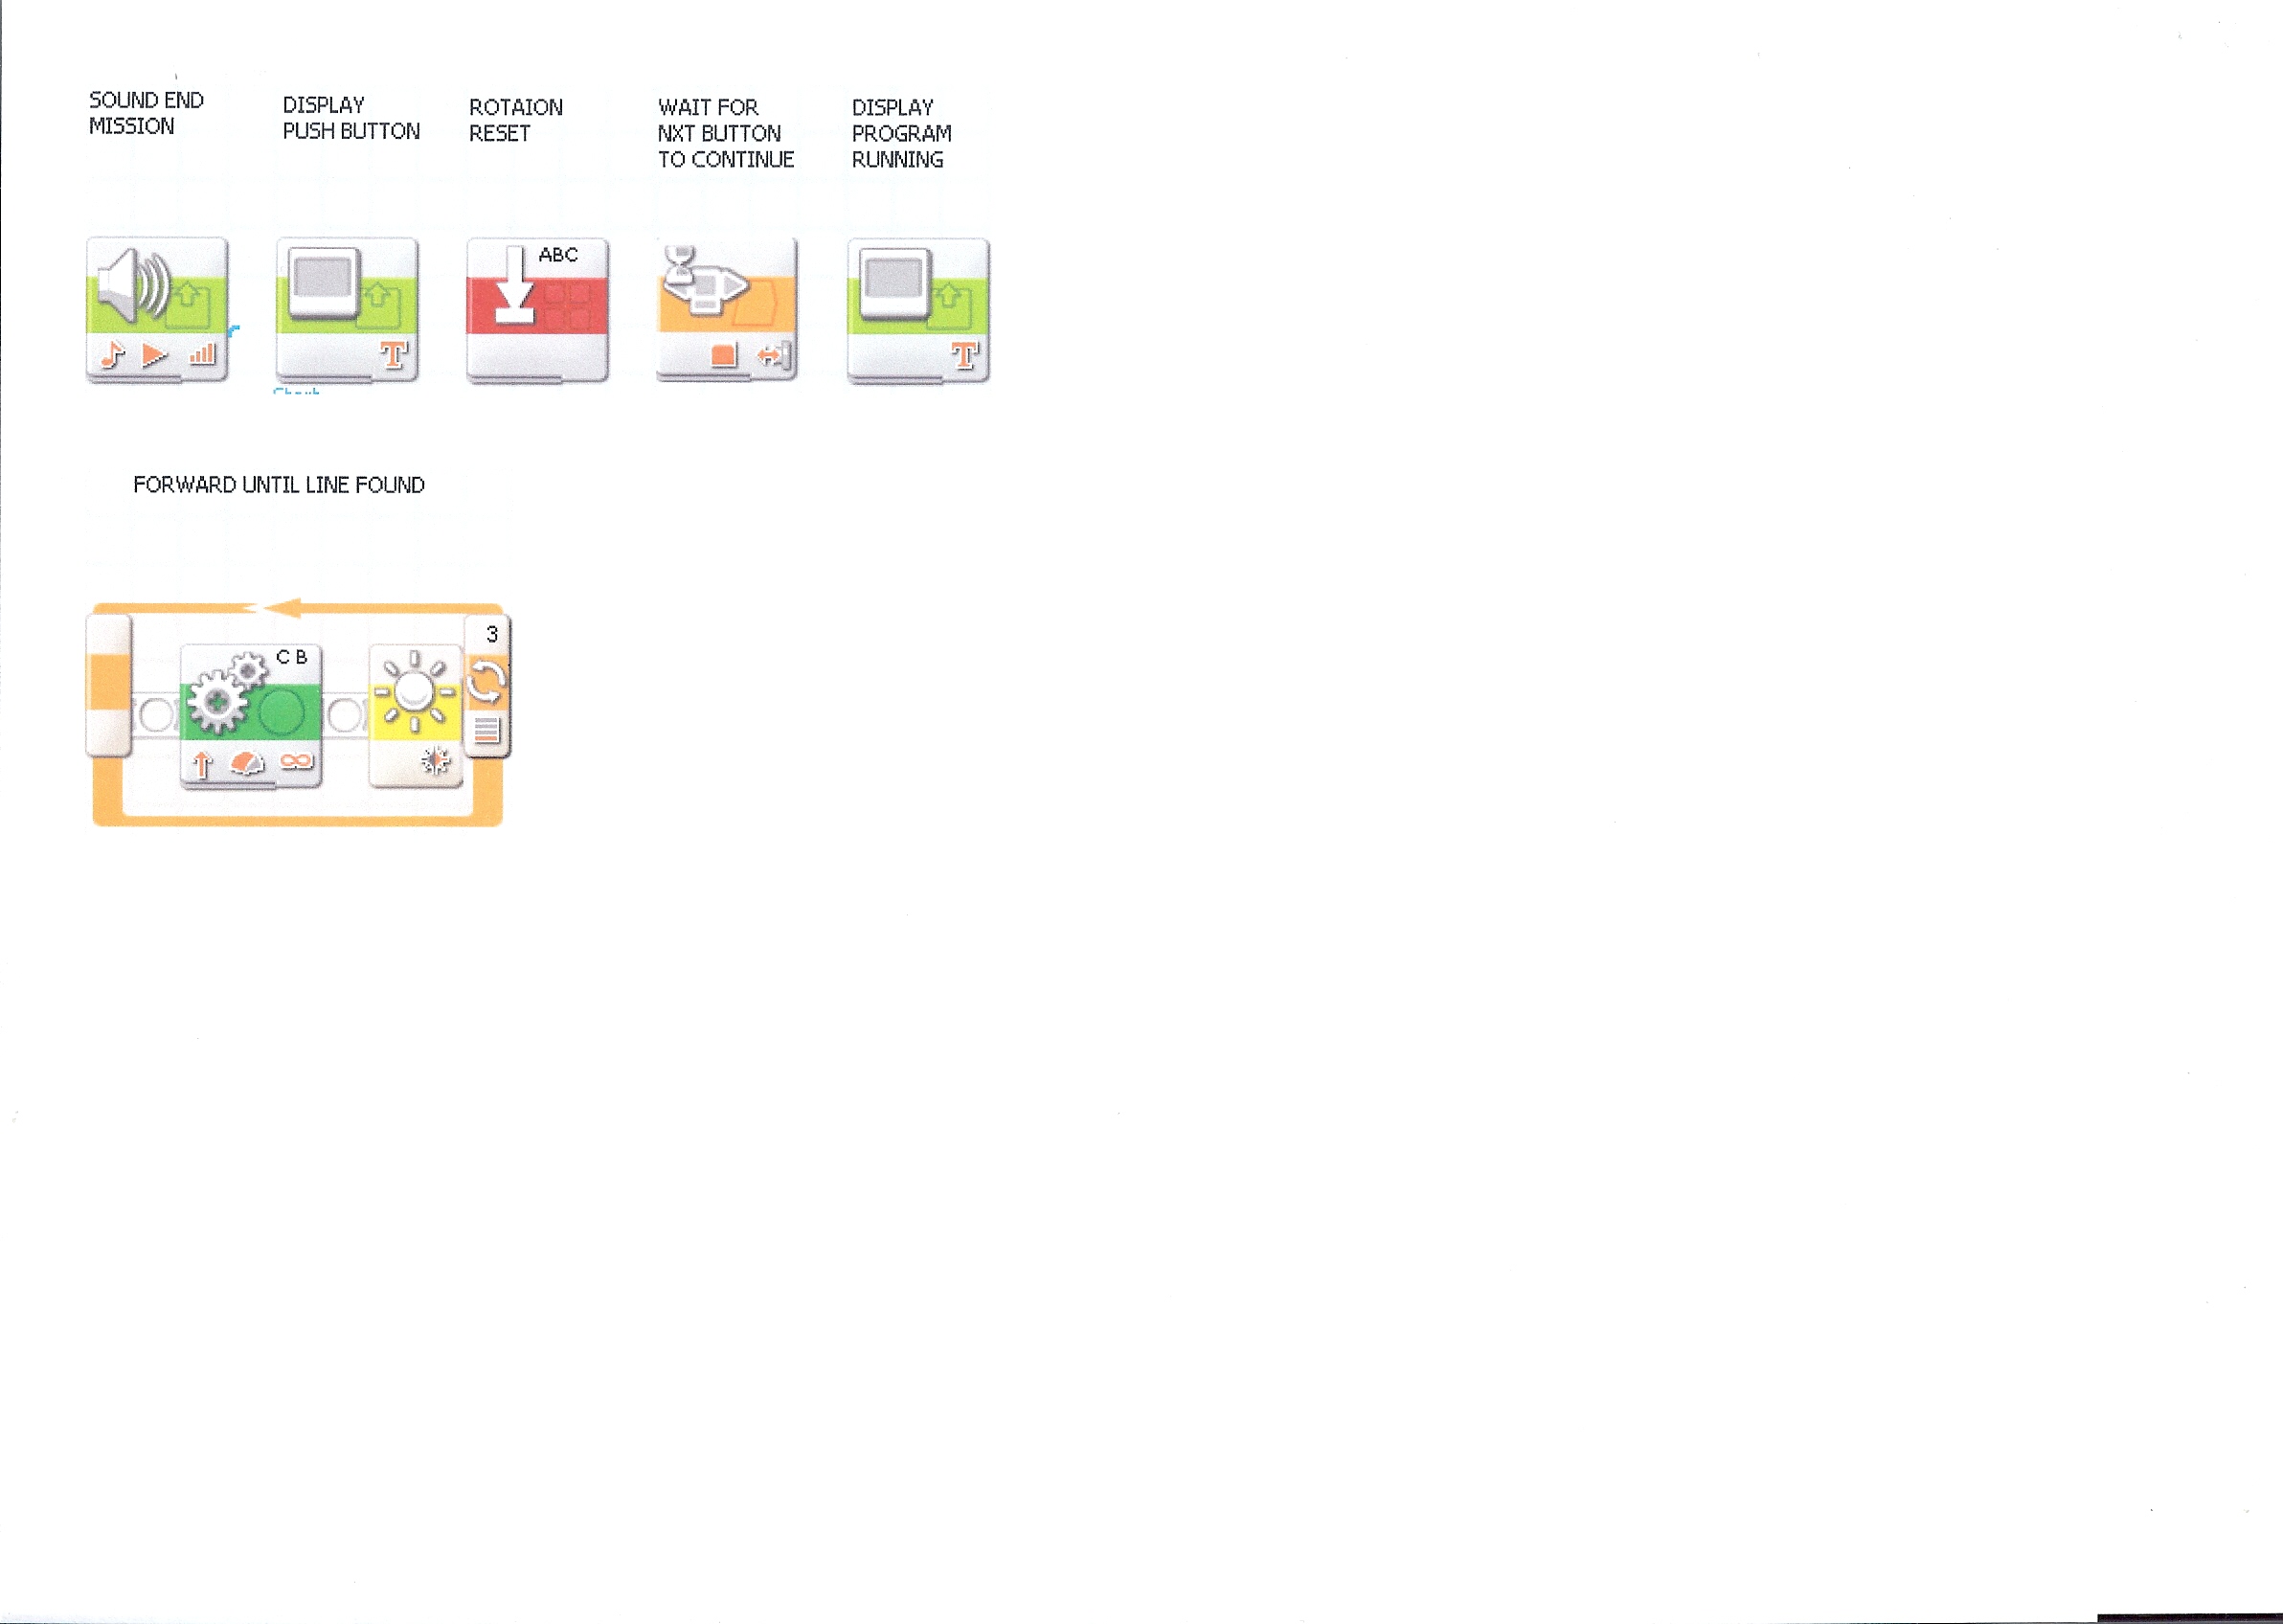
Above: You can put a complete mission
in a My Block than in between add a Program that waits until the button is
pushed before it will proceed to the next mission. Doing this you only have to
push one button for the next mission and do not have to look through the
missions to continue. Notice that we added mission 3 as a do over just in case
of failure (the my blocks save on memory space also).
Above: The first loop is a find the
line. The second loop is follow the line that uses "B" & "C" motors to drive.
The "B" before the lop is needed to run forever and the light block after turns
off the light to save power. We stop both drives right after so it will not cost
past the intended stop location.
Follow the line program
using time for the distance.
Changing the “<” and “>” signs in
the switch block will change which side of the black line the robot will follow.
Using the light sensor to
find a line
If there are other colors on the
mat it will make it difficult to find the correct light value. The light value
of a line would be approximately 36(light value) and the white would be
approximately 61 which means any value below 37 would trigger the light sensor
but we set the value we are looking for to half way between 36 and 61 which is <
48.5 ((61-36-25)/2 = 12.5 61-12.5 =48.5 or 36+12.5 = 48.5) to cover us for
changing light levels in the room. This would be simple on a white mat with a
black line but our mats have other colors so we have to adjust the light value
to just between the color levels on the mat and the black line value. So if the
colors on the mat are 41 and the line are 36 than we must set the level between
those two numbers which is < 38.5. With these numbers so close it would not
take much room light to change the values and make the robot not find the line.
Printing & Sub Routines
(*click on picture to view larger*)
When printing your program for the
judges,
if it is a large one it sometimes comes out too small to read like the one on
the left above, but you copy and past parts of it to Microsoft Word you can
make it large enough to read like the one on the right above. Click on the
above and you can see the sub routines we used in two locations. We started out
with three programs for the above and combined them into on. We used sound
block, display block, rotation reset block, wait for NXT Button Block and
another Display block in a sub routine we used between the programs to allow for
the drivers to know when the robot is ready for the next program. Above right is
two sub routines, the one just described and one to follow the line. To make a
sub routine (You must know for judging) use a b routines, the one just described and one to follow the line. To make a
sub routine (You must know for judging) use a My Block from the drop down
list and in that you build a sub routine. The My Block you can name it and than
drop it into your program as many time as you need it. The example program above
we named it START PROGRAM and we used it twice. The block named Start Program
has the sub routine in it which is above on the right.
If you have additional questions regarding
programming please use the
help window of the Mind Storm Program, all of this is in it. if all else
fails contact us and we will try to help you: